The installation of your Pascali Pressure Pump went well, you have finished tidying up and putting away all your tools, now it might be time for a well-deserved, pressurised shower!
But somehow, something is not working 100%, and you are not getting the results you were expecting.
In this article we explore common queries we receive after installations, and also share a couple of checks you can easily perform to diagnose and eventually troubleshoot a few possible causes.
Problems that might pop up after a pressure pump installation:
When I open a tap, the pressure pump doesn’t start!
Check that the power is on. This may be a simple explanation, but please remember to always switch the power mains off before and during working on electrical installations. (It does sometimes happen that one forgets to turn it back on).
If this isn’t the problem make sure that all your connections are secure, that there aren’t any loose terminals or breaks in the wire leading to the pump installation.
If there is no water going into the pump, the pump also won’t start. Ensure all your valves are open and there is water in the water source, such as the rainwater harvesting tank.
The pressure pump runs but there is no water coming out.
Is your pressure pump receiving water as it should?
Are there in restrictions?
Are all the valves open? Inlet & oulet valves.
Is there sufficient water in the tank?
Are there any bursts in the pipeline?
Is the inlet and the outlet connected correctly?
Is your non-return valve installed correct way around?
If you’ve eliminated all the pointers above, there may be an airlock in the system or air is getting in, which is a restriction on its own.
In order to get the air out of your system, simply loosen the brass nut or “bleeding valve/nut” on the pressure pump housing, to let out all the air. This will prime the pump housing and if the non-return valve was installed correctly, you shouldn’t experience this problem again.
The pressure pump starts and doesn’t switch off again
There may be a major leak in your system somewhere. The increase in water pressure due to your new pressure pump may have caused an underlying problem to suddenly come to the fore. This should be addressed as soon as possible.
The pressure pump starts and stops intermittently without you using water. Or the pump continuously switches on and off.
The type of pressure pump you have installed is important to note in this case.
In the case where a pressure pump has a flow control switch, there may be a small leak or dripping tap in your system. This will cause your pressure pump to sense that there is a flow, and therefore switch on.
Take this opportunity to do some maintenance on your entire water system, replace washers in leaking taps and check the flow mechanism of your toilet.
In the case of pumps that come with a pressure switch, instead of a flow switch, the pressure pump will react to a loss of pressure. Once again, the cause could be a leak in your system, such as a leaking toilet or piping. The pressure in your system keeps dropping, and therefore the pump’s pressure switch will activate.
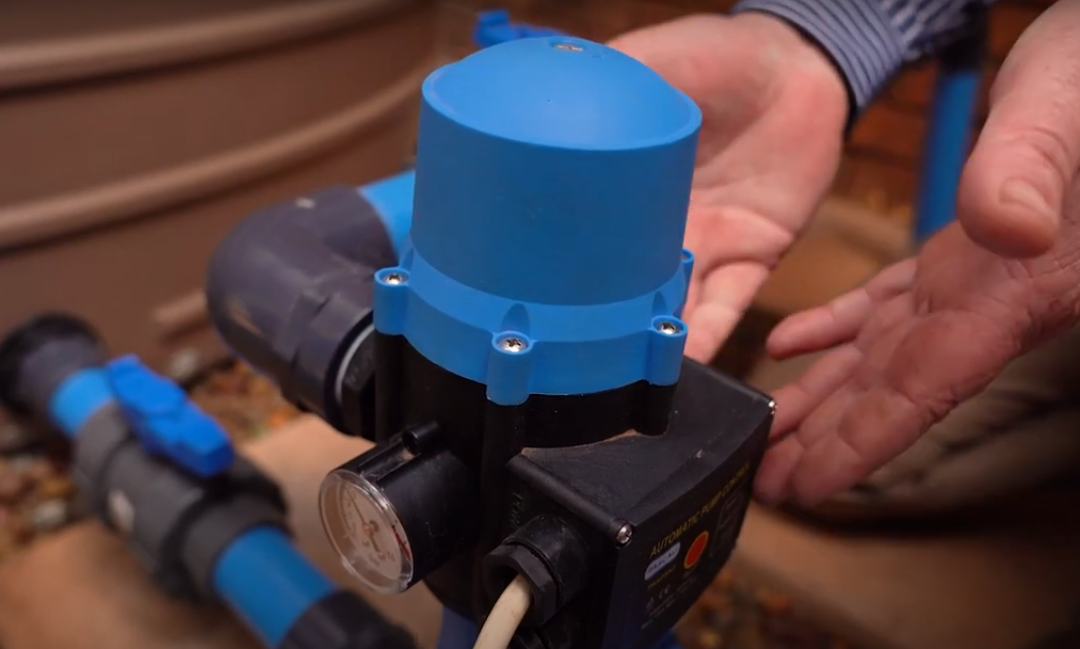
With pressure pumps that have a pressure switch, at the back of the pump there is a cart well, which is similar to a car valve, that has air in it. If you push the valve and the air comes out, everything is fine. If water comes out, it means the bladder inside has broken. If nothing comes out, the tank has lost its pressure and will need to be repressurized.
The pressure pump motor makes a humming sound but doesn’t turn.
There are typically two causes when this happens;
Your shaft or impeller is trapped. This typically happens after an installed pump hasn’t been used for a while. Rust can form on the inside of the cast-iron housing, seizing the brass impeller.
To loosen the rust, you can remove the cooling fan cover and gently turn the fan by hand. Disconnect the power before doing this. It should loosen the impeller and your pump should run normally. If it is really stuck you can remove the cast-iron housing, clean any rust buildup out with a steel brush and replace it. To prevent this problem from happening in the first place the pump should run at least one a week. If a pump is going to be idle for an extended period it should be disconnected and dried before storing.
Another reason could be that some debris that has become trapped. In this case, you will need to open the pump up, ensure the debris, or whatever blockage is trapping the impeller is removed.
Your capacitor is possibly faulty. This part “kick starts” the motor, and when it does not work, the pump motor won’t jump away, but instead, make a continuous humming sound, but it will not actually turn.
If these troubleshooting steps do not solve your particular problem, please contact a professional to have a look at your pressure pump.
Harvesting rainwater (or Rainwater Harvesting) to irrigate your garden or supplement your household water usage is one of the most cost-effective and sustainable decisions you can make. Rainwater is free and if you don’t use this resource, it simply flows away in the stormwater system and disappears.
For every 100 square metres of roof surface area, you can potentially harvest 100 litres of water if it rains just 1 millimetre! So, a downpour of 10mm could yield 1 000 litres of water.
Saving this water in a tank for a sunny day or dryer months is surely the way to go. In order to effectively use your harvested rainwater to water your garden, you can install a pressure pump that can be linked to your existing irrigation system to move this water, under pressure, to where it is required. You can supplement or even replace your current water supply, whether it is a borehole or municipal water. Saving you and the environment!
If you are considering installing a rainwater harvesting system in your home, keep reading for more tips and important information to note. In this article, we cover the following steps:
Your shopping list/key components of a Rainwater Harvesting system.
How to select the correct tank and decide on its placement at your home.
How to connect your gutters to your water tank.
How to install your pressure pump & tips.
Site requirements for your pressure pump to ensure prolonged service & perfromance.
Which Pascali pressure pump will work best for my set-up?
1. What are the key components of a rainwater harvesting system with a pressure pump?
Rainwater is harvested from a roof or slanted structure, from where water flows into a gutter or gutter system.
In order to stop debris / catch debris before it enters your tank, you need a gutter filter, such as a Gutter Buddy.
Piping to channel the water to your water holding facility, whether that is a tank or underground reservoir.
A pressure pump, piping and fixtures.
There should always be a non-return valve, one-way valve or check valve installed as part of the pressure pump system and these are usually included in the package. (Isolation valves)
Optional but recommended: Flow Control Switch
Protective Housing for your pump.
2. Selecting a water tank and deciding on the ideal placement for capturing rainwater.
Water tanks come in all shapes, colours and sizes. The most important element to consider when purchasing a tank when looking at Rainwater Harvesting is the size. This will be based on the water usage needs of your irrigation system or your household usage. There are many options when it comes to water tanks so do your homework to get the best deal. Keep in mind, the larger tanks will need a special delivery as they are larger than your average bakkie.
In the installation below, the team selected a 5000L tank both for fit in the location, as well as the usage was specified for irrigation for a medium-sized garden with an irrigation system.
Rainwater harvesting installation with Pascali Pressure Pump
If your house already has gutters and downpipes, it is a relatively simple process of selecting the best location for your tank. Select a location where ideally the most rainwater usually flows from but also consider that the tank should not block the view out of an important window. Below are more considerations to keep in mind when selecting a location for your Rainwater Harvesting set-up, and especially your tank.
A water tank should be placed on a perfectly level, smooth and sturdy surface, preferably a few centimetres off the ground. Many homeowners lay concrete slabs or create compacted platforms.
Keep in mind that a 5 000-litre water tank full of water will weigh more than five tons!
The reason why the base of the water tank should be lifted a little is to have the outlet of the tank slightly higher than the inlet of your pressure pump. This will help to keep the pump primed, or full of water, and prevent it from running dry and possibly causing damage to the motor.
The location of your water tank should also have enough room to install your chosen pressure pump securely and protected from the elements.
3. Connecting your gutters to your tank.
It is not recommended to directly link your gutters to your water tank, as debris can fall into the water tank and affect your water quality & the performance of your pressure pump. Best practice is to reduce the amount of large and small debris as much as possible that could land up in your water tank before the water hits the tank.
This can be achieved by installing specialised gutter & rainwater harvesting attachments like a Gutter Buddy and First Flush Mechanism.
The Gutter Buddy is designed to be installed at the point where your gutter outlet meets the pipe leading to the tank and will help stop large debris like sticks, leaves and insects to flow with your rainwater to the tank.
The First Flush mechanism, with its anti-cavitation feature, helps to prevent smaller debris like dirt and dust to flow into your tank.
It is very important to select the correct size first flush for the size of your roof. The larger the first flush, the less likely it is for debris to end up with your harvested rainwater.
4. Basics of installing the pressure pump & piping.
Correct installation of your pressure pump is extremely important, especially when it comes to ensuring the longevity and optimal performance of your unit. This type of installation will need some experience with plumbing as well as electrical work. If you do not have this type of experience, please consult a professional to help.
Before installing any components, even if you are not doing it yourself, please read the user manual provided in the box!
5. Site requirements for installing my pressure pump connected to a Rainwater Harvesting set-up:
An electrical point must be at close proximity to the location in order to power the pressure pump.
The electricity supply should also be secure and weather-proof. The distance to the pump from an existing power supply will affect the length of cable you need to install, keep in mind this will have an influence on the installation cost.
Pressure pumps come with mounting holes in the base so that it can be fixed to the floor. This ensures that the pump always stays upright and in the correct position. Any kind of vibration or the mere action of turning on and off can cause a loose-standing pump to wander out of position.
Ensure there is a mounting platform / space (ideally concrete) to which the pressure pump can be mounted/fixed, close to the tank.
The routing of the pipe coming from your tank into the inlet of the pump should be as straight as possible for at least 5 to 10 times the size of the diameter of the inlet. IN the case of our installation, our pipe diameter was 32 mm, so we needed at least 150 to 300mm of straight pipe.
Straight pipe from tank to pressure pump inlet, with isolation valve in open position.
To prevent any turbulence in the water entering the pressure pump. Installing 90-degree elbows close to the pump’s inlet causes turbulence which can result in air bubbles forming which can damage the pressure pump.
Best practice is to install an isolation valve with your inlet piping. This is to make pump maintenance easy, as the inlet can be closed off, and the pump can be disconnected without your tank running empty.
An important factor to consider on the inlet is the size diameter of the pipe. Also keep in mind that water pressure and flow is affected by friction inside the pipes. The size and length of the pipe will affect the flow and pressure where you need the water. If your pipe is too small, the water from the tank is not going to be readily available.
On the outlet our recommendation is to install a flow control switch, which acts as the brain of your system. The switch tells the pressure pump when to switch on and when to switch off, or when valves are open, or valves are closed.
Pascali Flow Control Switch
The outlet pipe needs to connect to the main line of the house or your irrigation system.
Another isolation valve needs to be installed close to the pressure pump on the outlet pipe. Again, this is to make maintenance easier.
Isolation valve on the outlet.
To protect your Pascali unit from the elements, and to ensure the pressure pump works for longer, install the machine in a little housing unit, taking care that there is sufficient airflow around the engine.
6. Which Pascali pressure pump should I use for my rainwater harvesting system?
All Pascali pressure pumps can be used for rainwater harvesting systems, but because of debris, the centrifugal and jet pump units are a better call. The size of the pump required depends on your water and pressure needs.
Specialists like the people at Pascali or your local hardware/irrigation specialist store will be able to advise you on exactly what will suit your requirements and will also refer qualified installers in your area.
For more information on how to install a water tank and pressure pump in order to capture rainwater, have a listen to one of Pascali’s technical advisors share tons of information and tips.